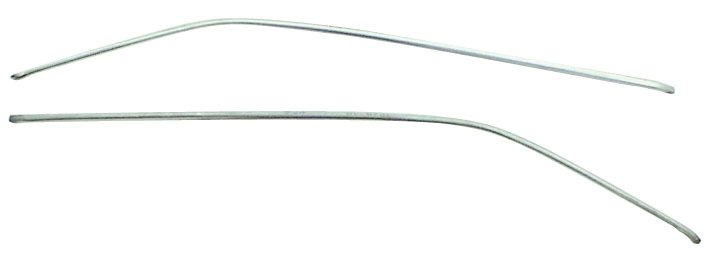
This roof drip rail moulding set is a direct-fit replacement for 1966-1967 GM A-Body 2-door sedans and hardtops, restoring the original roofline trim while protecting the drip rail channel from water intrusion and rust. The mouldings secure the weatherstrip, help divert water away from door openings, reduce wind noise, and return an authentic OEM appearance to restoration projects. Made from corrosion-resistant, polished stainless steel with an accurate OEM profile, the set delivers long-lasting durability, reliable fitment, and straightforward installation for maintenance or full restorations.
Features:
- Fits 1966-1967 GM A-Body 2-Door Sedan and Hardtop vehicles (Chevelle, GTO/LeMans/Tempest, Cutlass, Skylark).
- Polished stainless steel construction with OEM-style profile for authentic restored appearance.
- Direct replacement mouldings that align with original mounting points and clip locations.
- Secures roof weatherstrip, channels water away from door openings, and helps prevent rust and interior water leaks.
- Durable, corrosion-resistant finish ideal for restorations and long-term maintenance.
- Easy to install with basic trim tools — suitable for confident DIY installers and professional shops.
Installation / Application:
- Difficulty: 2/5
- Estimated time: 1-2 hours
Instructions:
- Park vehicle on a level surface, engage parking brake and protect surrounding paint with masking tape along the roof edge.
- Remove the old moulding by gently prying at the ends and working a trim tool along the moulding to release the clips and retainers. Save any serviceable clips.
- Clean the drip rail channel thoroughly with rubbing alcohol and a clean cloth to remove old adhesive, dirt, and rust. Repair or replace damaged clips or retainers.
- Test-fit the new moulding by aligning the front edge and laying the moulding into the channel to confirm orientation and fit.
- If required, install new retainer clips into the channel at the original clip locations before seating the moulding.
- Starting at the front, press the moulding firmly into the channel and engage each clip along the length. Use a rubber mallet gently if needed to fully seat the profile.
- Trim or seat the ends as needed and reinstall any end caps or seals. If using adhesive or sealant, follow the product cure time before exposure to moisture.
- Perform a final inspection for even fit and proper sealing. Road-test to confirm there is no wind noise or leaks around the installed moulding.
Vehicle Fitment:
The Vehicle Fitment Guide is to be used as a general reference. The data has been provided by our suppliers and manufacturers and may contain errors or incorrect data. Always refer to a professional to verify correct fitment for your vehicle.
| Make |
Model |
Years |
| Buick |
Skylark |
1966 - 1967 |
| Chevrolet |
Chevelle |
1966 - 1967 |
| Chevrolet |
Malibu |
1966 - 1967 |
| Oldsmobile |
Cutlass |
1966 - 1967 |
| Pontiac |
GTO |
1966 - 1967 |