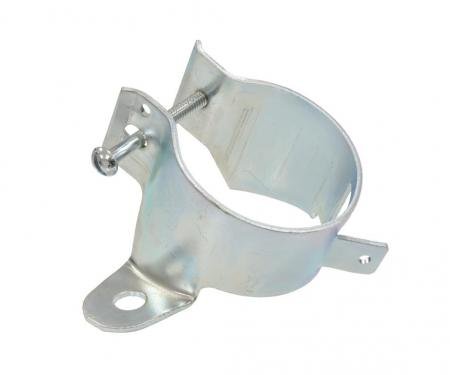
Redline Restomotive® Ignition Coil Mounting Bracket Bolts are precision replacement fasteners designed to secure the ignition coil mounting bracket on 1965–1972 GM passenger cars. These reproduction bolts restore proper fit and function, helping maintain stable coil alignment and reliable electrical grounding. Manufactured from high‑grade corrosion‑resistant steel with a protective finish, they offer long-lasting durability and dependable performance for restorations, repairs, or routine maintenance. Easy to install and sized to match original equipment, these bolts make a straightforward upgrade when refreshing engine bay hardware.
Features:
- Fits 1965–1972 GM passenger cars (Chevrolet, Pontiac, Oldsmobile, Buick, Cadillac) for original-style ignition coil bracket mounting.
- High‑grade steel construction with a corrosion-resistant finish for long-term durability under the hood.
- Direct replacement for original mounting bolts to restore correct coil alignment and secure attachment.
- Helps maintain proper grounding and reduce vibration that can affect ignition coil performance.
- Ideal for restorations and maintenance — reliable, OEM-style fit and finish for authentic appearance.
- Simple swap-in hardware — sold as a set sized to match original factory specifications.
Installation / Application:
- Difficulty: 2/5
- Estimated time: 15 minutes
Instructions:
- Park vehicle on a level surface, set parking brake, and disconnect the negative battery terminal to prevent accidental shorting while working near the ignition system.
- Locate the ignition coil and its mounting bracket on the engine. If replacing old bolts, spray penetrating oil on fasteners and allow it to soak per product directions.
- Remove the existing mounting bolts using the appropriate socket and ratchet. Retain any factory washers if present or replace with new hardware supplied.
- Clean the bolt holes and mating surfaces with a rag to remove dirt, grease, or corrosion. Inspect bracket and coil mounting points for damage.
- If desired, apply a small amount of blue (medium strength) threadlocker to the bolt threads to resist loosening from vibration. Alternatively, use a small dab of anti-seize on threads only if preferred for future removal.
- Position the ignition coil and bracket, insert the Redline Restomotive® bolts, and hand-start each bolt to ensure proper thread engagement.
- Tighten bolts evenly with a socket wrench. Torque to the factory specification if available. If the factory spec is not known, tighten carefully to a snug setting (approximately 8–12 ft‑lbs) without over‑torquing to avoid stripping sheet metal threads.
- Reconnect the negative battery terminal, start the engine, and check for secure fit and absence of vibration or electrical issues. Re-torque after initial heat cycle if desired.
Vehicle Fitment:
The Vehicle Fitment Guide is to be used as a general reference. The data has been provided by our suppliers and manufacturers and may contain errors or incorrect data. Always refer to a professional to verify correct fitment for your vehicle.
| Make |
Model |
Years |
| Chevrolet |
Camaro |
1967 - 1969 |
| Chevrolet |
Chevelle |
1965 - 1972 |
| Chevrolet |
Estate |
1969 - 1970 |
| Chevrolet |
Malibu |
1965 - 1967 |
| Pontiac |
Firebird |
1967 - 1969 |